How To Cross A Stream While Hiking In The Sierra
Crossing a stream in the high Sierra can be an upbeat, thrilling experience. From the first moment your hear the coursing water, to your final step out of it’s ice cold flow, there is a rush of excitement. However, crossing a fast moving stream or river without a bridge can be dangerous if not properly prepared.
You could get injured with a slip. Your gear or food could get wet, ruining your trip. You could drown. These are scenarios you want to avoid.
We’ve lead hundreds of people across the Sierra, through rushing waters, and over snow covered passes. Some routes have dozens or more high-flowing stream crossings over the course of a single week. Based on our experience, here are our top 10 tips for crossing a stream while hiking or backpacking in the Sierra.
- Cross a steam while hiking with a friend
- Cross a stream early in the morning or when flow recedes
- Always undo your hip belt and chest strap before you cross
- If your initial crossing point looks sketch, scout a better spot
- Use good stream crossing technique
- Keep your shoes on
- Trust your instinct
- Prepare your gear for getting wet
- The driest options isn’t necessarily the safest
- Research conditions before you start the hike
Let’s take a look these tips for crossing steams safely in more detail.
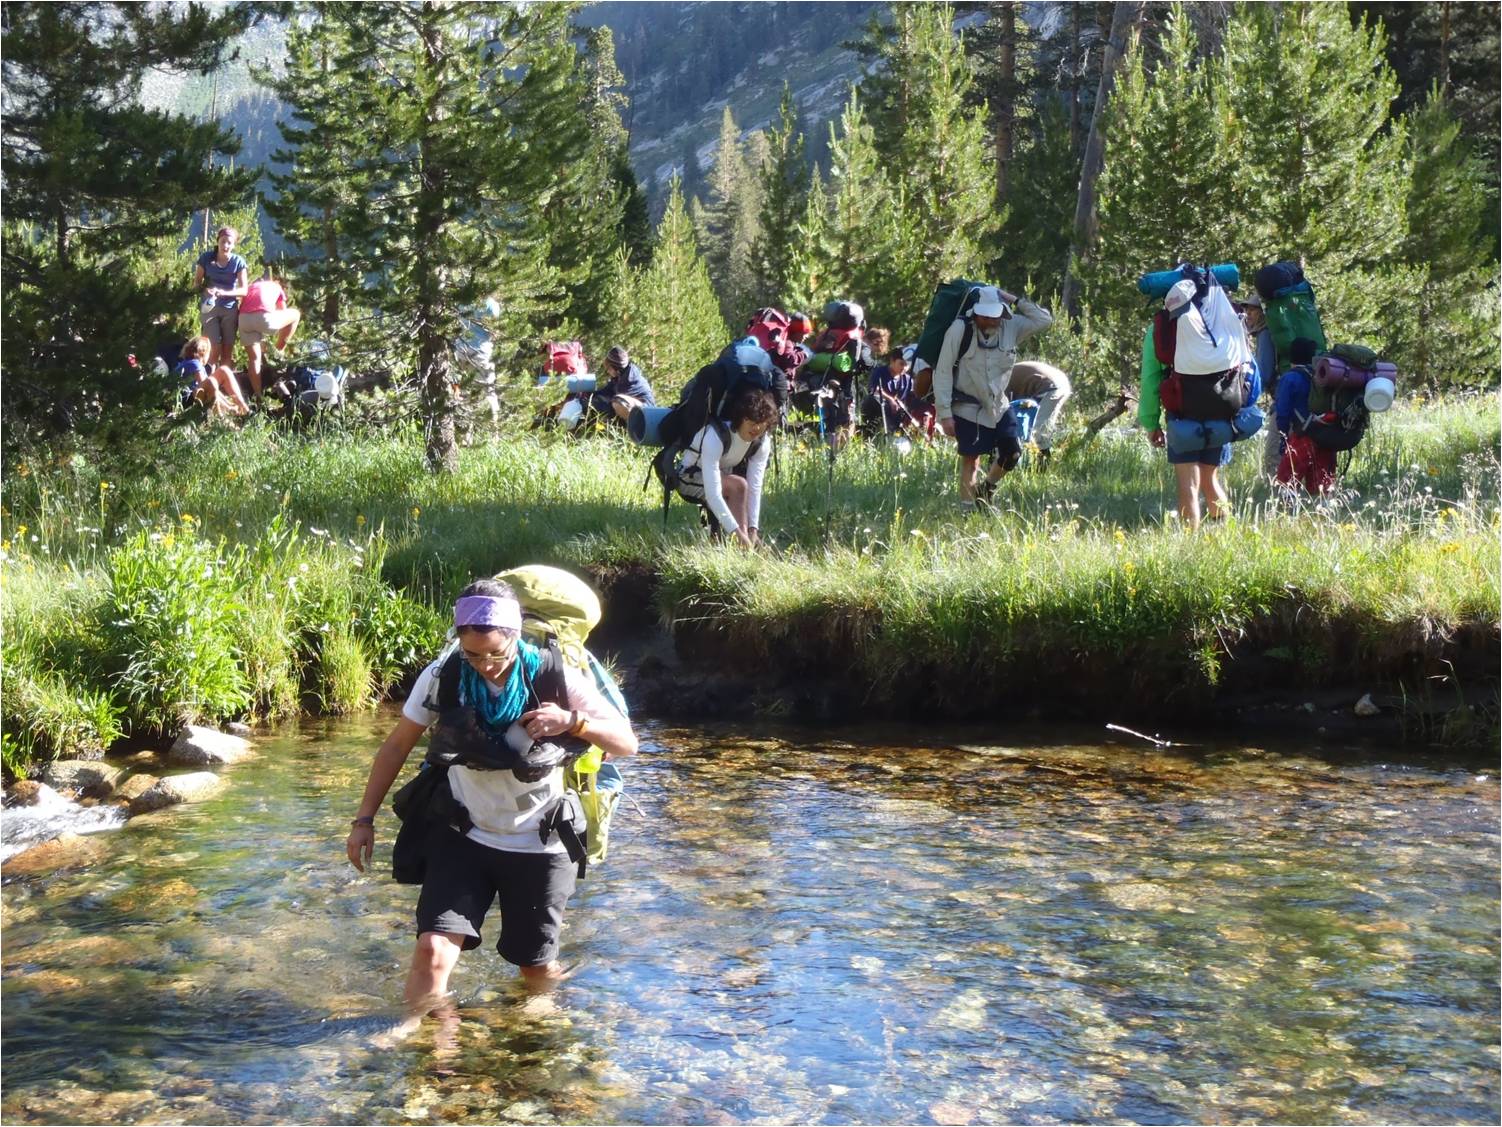
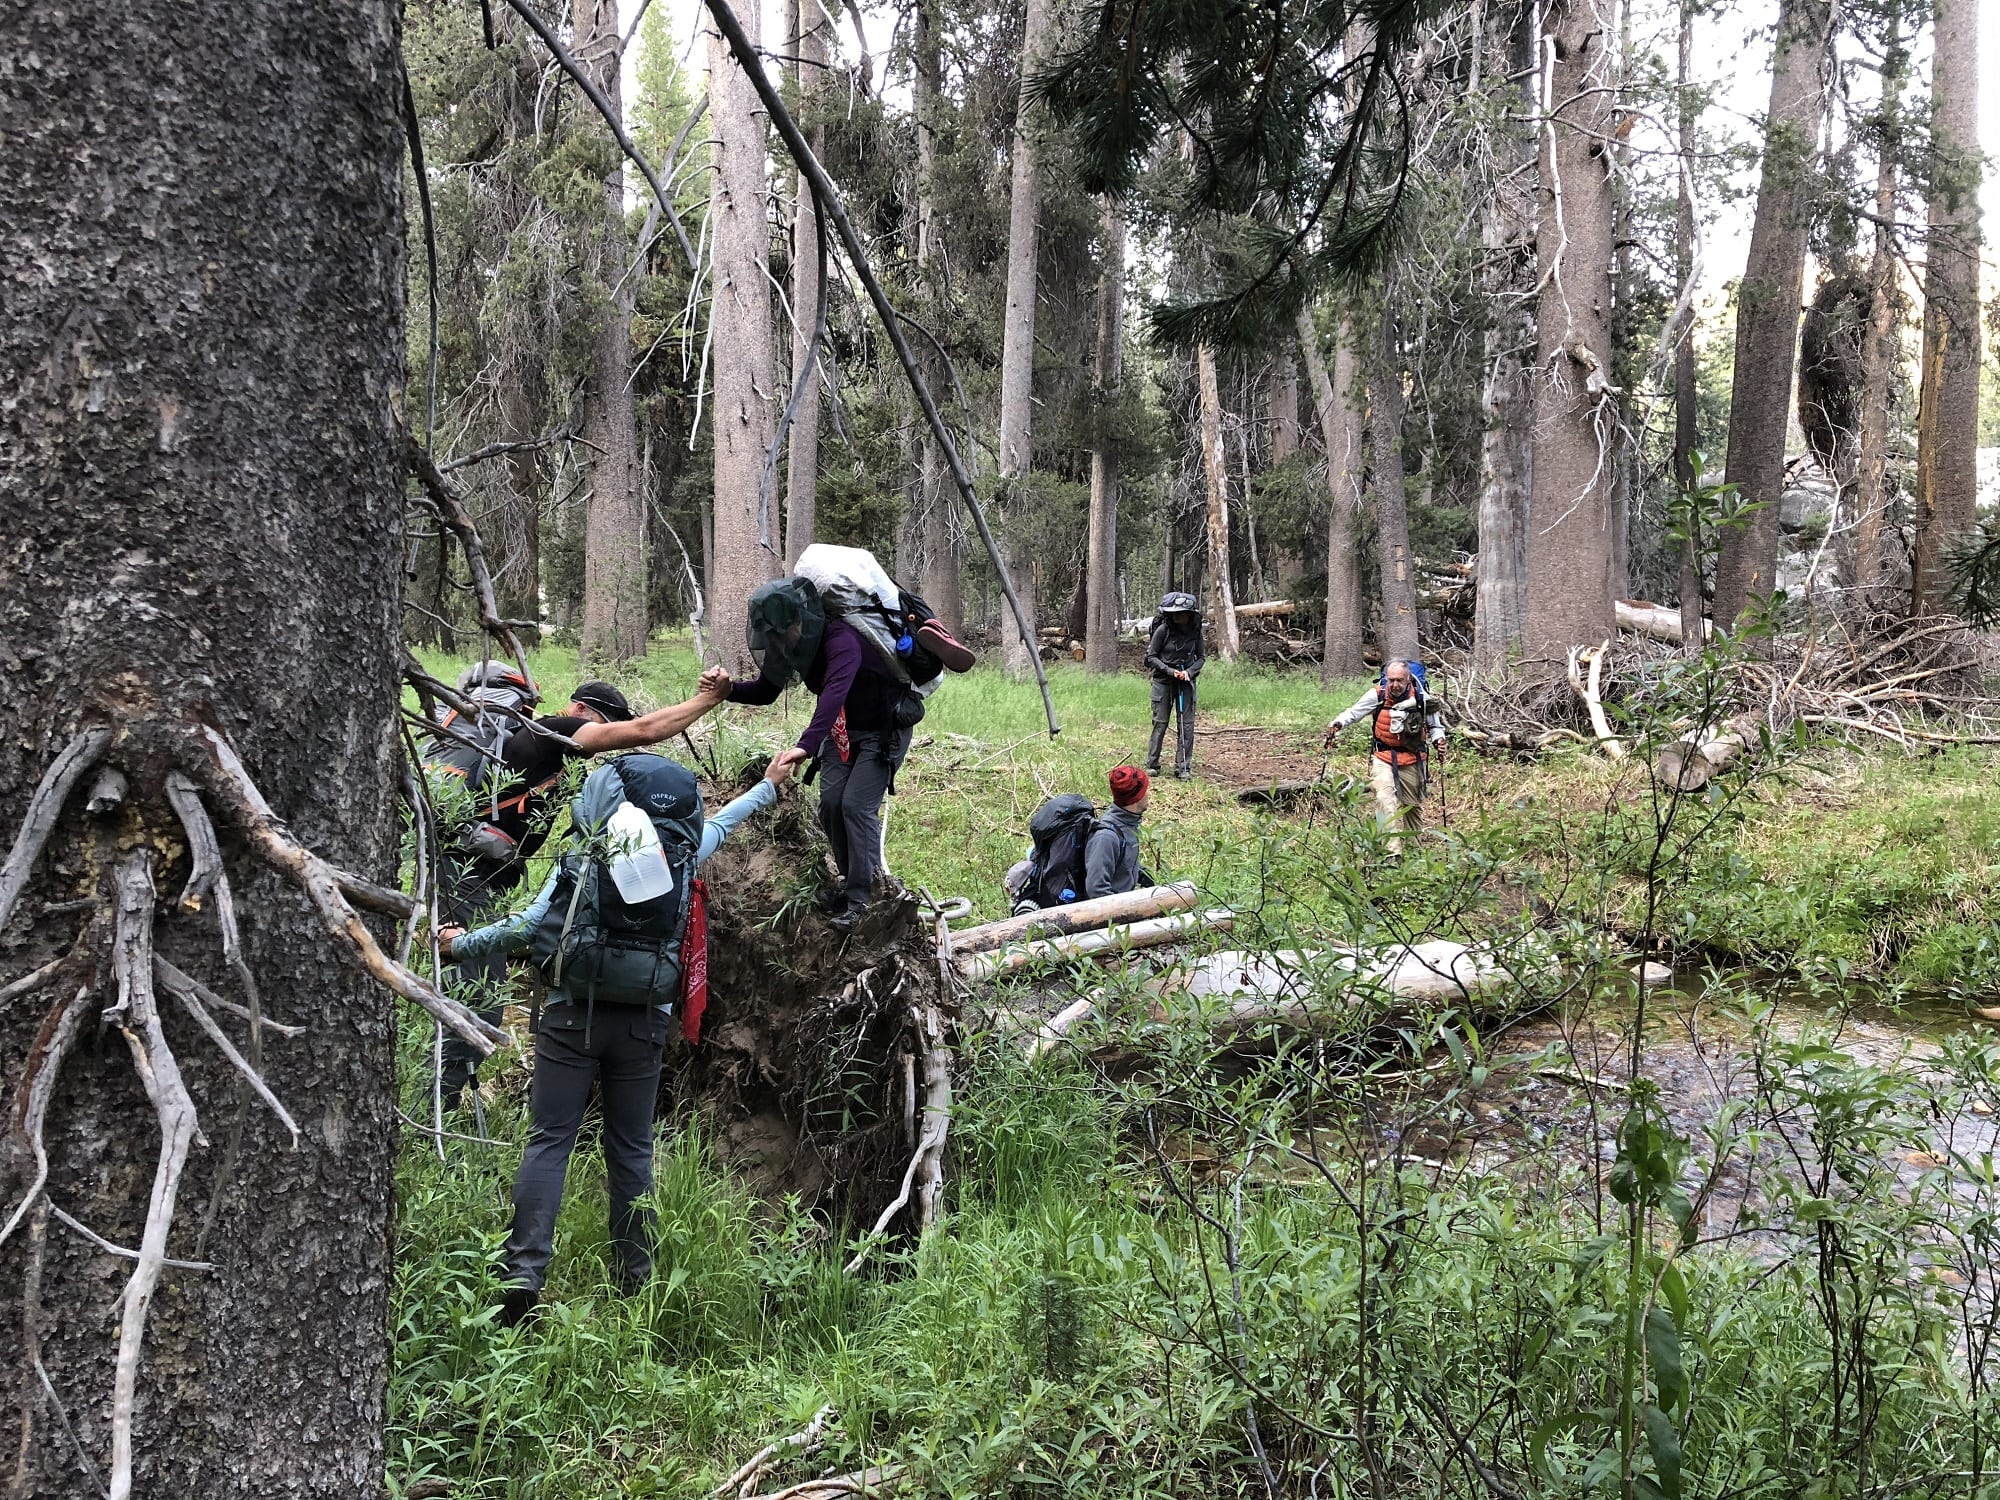
Cross a stream with a friend
Crossing a stream can be a challenging and potentially dangerous experience, particularly if you’re hiking or backpacking alone in a remote area. That’s why the number one safety tip is to cross a stream with a friend. Not only does it provide an extra set of eyes to help identify the best crossing point, but it also ensures that there is someone nearby to help in case of an emergency. Plus, who’s going to be there to take that picture of the epic crossing for your social media post?
Cross a stream early in the morning or when flow recedes
High Sierra stream flows can change each day and throughout a day. Typically, high mountain streams are safer to cross early in the morning when the water is at its lowest point due to cooler temperatures and reduced snow melt from overnight. If you’ll be camping near a stream crossing, put a stick or a rock at it’s water line to measure which if flows are rising or falling. We’ve had streams rise and fall by the feet in some locations throughout the day and overnight. Similarly, waiting for the stream flow to recede to its lowest point, which can occur after a rainstorm or during days with cooler temperatures, can provide a safer crossing environment. Planning ahead and timing the crossing can minimize risk.
Always undo your hip belt or chest strap before you cross
Few things are worse than being strapped to a 40 pound backpack after falling in a stream with rushing water coming over the top of you. Don’t put yourself in that situation. By undoing your hip belt and chest strap, you can quickly ditch your backpack in case you lose your footing or fall in the water. Let the pack go down stream, you can fish it out later! Live to hike another day.

If your initial crossing point looks sketch, scout a better spot
If the initial crossing point on the trail appears to be dangerous or unsafe, take your time and seek an alternative crossing point. Hike upstream or downstream to a safer location where the stream or river braids, or flow is more gentle. If an easier spot isn’t readily identifiable, break out the topo map and really look for where the topography might change or where rivers and streams connect. You may need to hike a significant distance to find the perfect spot. Scouting a safe crossing point may take longer, but it’s worth the effort to ensure your safety.
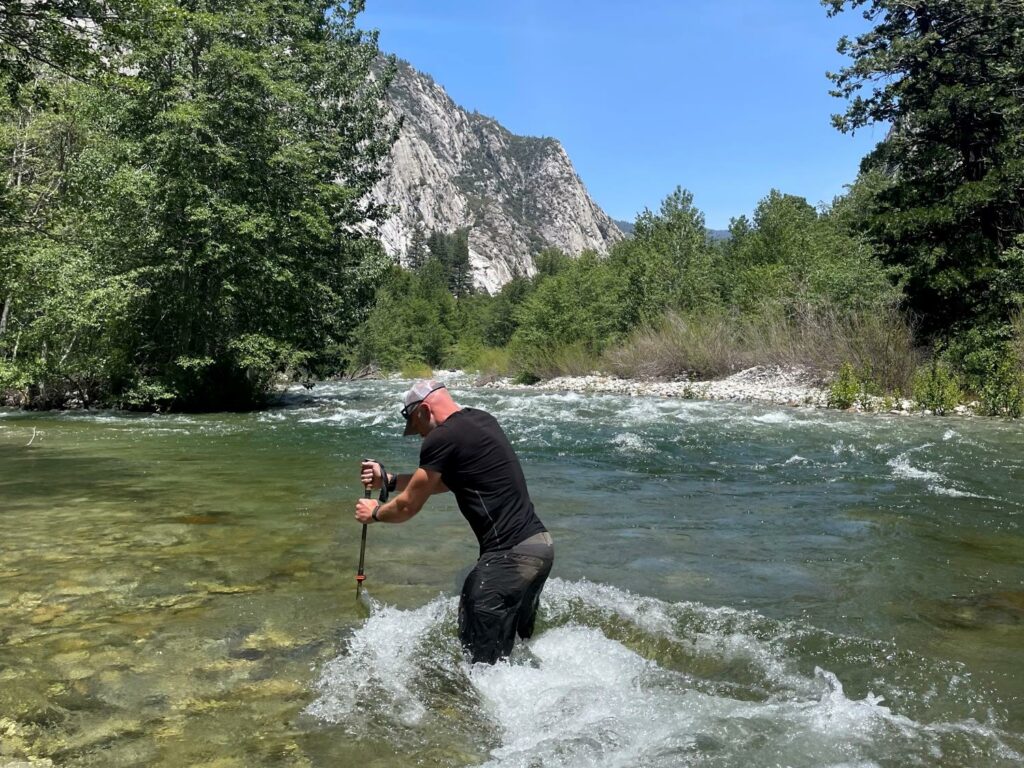
Use good stream crossing technique
When it comes to crossing streams the best technique depends on the situation, including the depth and flow of the water, the size and weight of your backpack, and the width of the stream. But we’ll tell you this, when water is flowing high, the method we prefer in the Sierra is the three-legged stool approach. Stash one pole in your pack, and put two hands on one pole to create a stable tripod-like stance. Your shoulders and body should face perpendicular to the flow of the water. Keep your knees bent, with slight lean forward. Move one foot or pole at a time, letting your lead leg drift slightly down stream with each step so you’re night fighting against the current.
Keep your shoes on
Unless you are trying to audition for a wet and wild version of Dancing with the Stars, keep your shoes to minimize spins, slips, twirls and tumbles! Wearing shoes with good traction can helps maintain your footing, protects your feet from rocks and sharp objects, and insulates them from the ice cold water flow. Checkout our backpacking footwear blogpost, “Don’t Get The Blues Hiking In Wet Shoes” for more tips on preparing your feet to hike wet.
Trust your instinct
If you take a few steps into the stream and feel like the current is too strong, or the footing is unstable, don’t ignore that feeling. Step back out and reassess. Intuition can be your best friend in these scenarios! Take a moment to reassess the situation and look for an alternative crossing point. If there isn’t one, it may be best to turn back and find another route.
Prepare your gear for getting wet
Prepare your backpack and gear properly before you attempt to cross a high flowing stream while hiking or backpacking. This means packing your sleeping bag in a waterproof bag or wrapping it in a plastic bag to keep it dry. Pack your sleeping bag at the top of your backpack incase the lower portion of your pack gets wet in the crossing. Secure all electronics, including your phone, chargers, etc. in waterproof bags or containers. Ensure that your belongings stay safe and dry in the event of an accident.
The driest option isn’t necessarily the safest
Hopping over slick wet rocks or using a down log that is elevated high above the water may seem like an easier way to cross the stream without getting wet, however, this can actually be more risky than wading through the stream itself. Slick rocks can cause you to lose your balance and fall into the water, while logs can be slippery and unstable, especially with the morning dew. Serious injuries happen when people fall off a logs from high above a river. You can also get swept downstream. It’s frequently better to wade through a stream using proper techniques than to take unnecessary risks over slick rocks and logs just to keep your feet dry.
Research conditions before you start the hike
Get to know current trail conditions and plan ahead for high flow creek crossings before you begin your hike. In the Sierra, you can get trail information by contacting the local forest service office or back country office. You can also browse hashtags and outdoor groups on social media pages for current conditions. Take current weather, and past seasonal weather into account. Was it a big snow winter? If so, expect high flowing streams to linger well into the summer. Will a sudden spike in temperatures drive a big change in snowmelt while you are out? Are monsoonal rains in the forecast? Advanced preparation will pay dividends.
Crossing a stream can be one of the most thrilling and intimidating parts of a hiking or backpacking trip, but with knowledge and preparation, you have what it takes to make informed decisions and set yourself up for success.
As experienced backpacking guides, we have helped people of all ages and experience levels venture into the remote backcountry while crossing streams and traversing remote terrain. If you want to confidently venture into the rugged beauty and tranquility of the backcountry without the stress and worry of planning and safety, consider joining one of our guided backpacking trips in the Sierra or the Grand Canyon. Click on to learn more or follow us on Facebook or Instagram for updates and inspiration.