Links To Backpacking Gear We Use
There are endless backpacking gear blogs and opinions on the internet that can be overwhelming or consume hours of your time. We created this page to simplify backpacking gear by providing a list of connected products that we know will work for most people based on our experience.
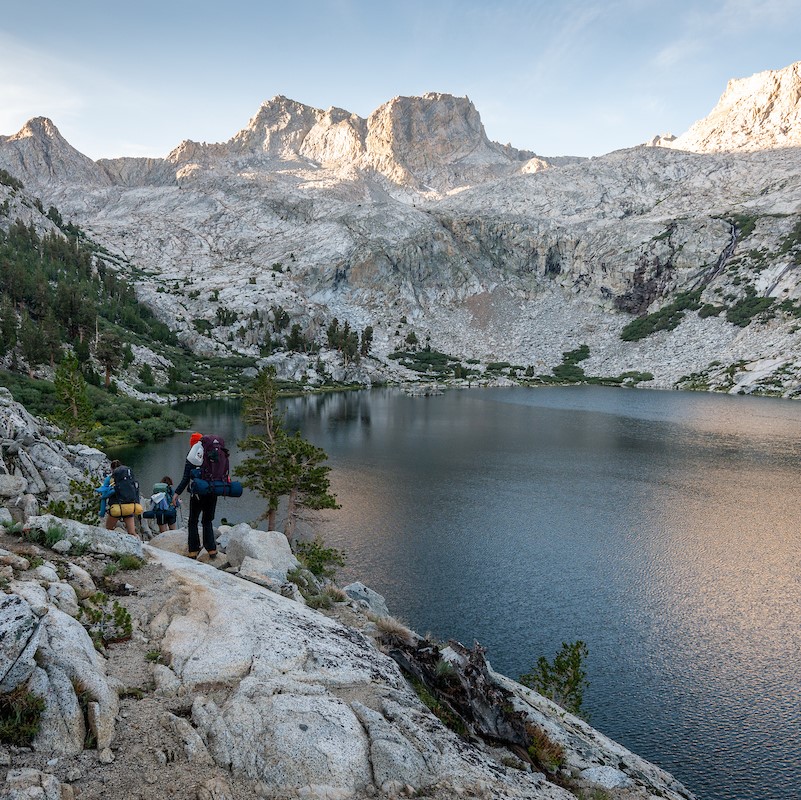
This page makes it easy to quickly find items you need from our backpacking gear checklists and get them delivered within a few clicks. Review our checklist first to identify what you need, then read on.
Please note what works for us may not work for you. There are many great backpacking gear options on the market differentiated by factors such as weight, durability, size, price and more. When notable, we explain which factors weigh more importantly to us.
Major Pieces of Gear
There are four major pieces of gear everyone needs (backpack, tent, sleeping bag and sleeping pad). We provide all major pieces of gear at no additional charge to those who need them for all of our backpacking trips. This helps minimize upfront investment if new to backpacking. Participants who have or prefer to purchase their own gear are welcome to bring their own.
Backpack
For all our treks, we recommend an internal frame backpacking pack that is 60 to 70 liters volume capacity. Standalone pack weights typically range between 3-5lbs. The packs we provide are a version of the Dueter 65 Liter AirContact Lite. This pack is fully adjustable to fit a range of torso sizes, durable, comfortable and offers great back ventilation.
Dueter Unisex AirContact Lite 65+
For youth and individuals with petite frames, the packs we provide are a version of the Osprey Ace 50. This allows for a better fit around the hips.
Tent
For all our treks we recommend a 1- or 2-person three season backpacking tent at a weight of no more than 3lbs per person. The tents we provide are a version of The North Face Stormbreak series. We use this tent because it is durable, of good value, free-standing and quick to setup. For exceptionally tall or large individuals, the 1 person tent may feel tight. Purchasing a tent footprint is unnecessary. We make our tent footprints with a cut of vinyl table cloth or tyvek. The footprint serves as an added moisture barrier between the ground and your body imprint.
The North Face Stormbreak 1 Person Tent
The North Face Stormbreak 2 Person Tent
Sleeping Bag
For all our treks we recommend a sleeping bag rated at least 20 to 30 degrees Fahrenheit. The sleeping bags we provide are a version of the Mountain Hardware 15 and 20 degree down sleeping bags series. Down is lighter for the amount of warmth it will provide versus synthetic. We’ve found these bags to be of reasonable value and durable for the price and weight. While some sleeping bags are labeled and designed for men or women, or right handed and left handed individuals, most people won’t notice a difference in function. For exceptionally tall individuals, we provide the “long” product version.
Men’s 15 Degree Down Sleeping Bag
Women’s 15 Degree Down Sleeping Bag
Sleeping Pad
Sleeping pads provide insulation between your body and the cold ground when sleeping. For all our treks we recommend a sleeping pad with an insulating value (r-value) of at least 2. Whether you go with a foam pad or an air pad, that is up to you and a matter of personal comfort and weight. The sleeping pads we use for our guests are a version of the foldable “egg carton style” foam sleeping pads. They are durable, reasonably light, insulate well, and never pop. Here is one of the brands we may use.
Therm-a-Rest Foldable Sleeping Pad
Trekking Poles
Trekking poles are optional on all treks but highly recommended, especially in the Grand Canyon. They offer support, stability and help with balance and preventing falls. We provide trekking poles to those who need them. High-end ultra-light trekking poles are nice, but can require a significant investment. We use poles that are durable and can be adjusted to an individual’s height. Here is a link to one of the trekking poles we may use.
Layered Clothing
When selecting your clothing, we suggest starting in your closet first. Think layered and lightweight. Darker colors hide dirt better than lighter ones. We won’t get into fibers and types of material, but quick drying and moisture wicking items are generally preferred. You may see backpacking blogs recommending you avoid cotton. Generally we disagree with this. Some materials are better and more versatile for backpacking in certain climates, however, if you have a cotton shirt that is light and works well for you, bring it! We do.
For most trips, you want access to up to four layers on top and two layers on bottom. Top layers include a base layer, long sleeve shirt, short sleeve shirt and warm jacket. Bottom layers include a base layer and hiking pants. Underwear is not a layer.
Base Layer
This is your insulating layer closest to your skin that you will wear at night or in the mornings when it’s cold. The recommended material is merino wool but there are great synthetic options out there as well. For most trips a base layer top is all you will need. When colder weather is forecast, or if you run cold, you might also consider bottoms. Here are links to a variety of brand options to consider.
Hiking Shirts and Pants
These are the primary clothes you will be hiking in. Personally, we hike in long shirts and long pants to give sun protection, bug protection and brush protection. They also help insulate when paired with a base layer. In addition to our hiking clothes, we often change into our lightweight cotton t-shirt for hot days, for sleepware, or to hang out in at camp. We also bring a lightweight bathing suit or pair of shorts to swim in.
Warm Jacket
There are lots of different types of insulating layers. Sometimes we bring a warm puffy, sometimes a warm fleece, sometimes both. The important thing is try to pick something that will work in conjunction with your other layers. Most people just need a base layer, hiking layer and then a solid down puffy to insulate. For trips with cooler temperatures, or for people prone to cold, you might want one additional lightweight fleece layer to go between your hiking shirt and puffy. If you don’t have a puffy, but have a thick fleece, a solid rain jacket/wind breaker may be all you need for that added warmth on chilly days.
Rain Protection
We ask participants to bring a rain jacket or poncho on all of our treks. Even if rain isn’t forecast, afternoon storms are common, especially in the Sierra. Forecasts can also change while on the trail. A lightweight rain jacket or simple plastic rain poncho is all that is needed. You likely have both of these at home. Just bring one, you don’t need both.
Hats and Gloves
You will absolutely need a hat for sun protection during the day. Baseball caps, full brimmed sun hats, hiking hats or visors all work. You will appreciate an insulating warm hat for the nights and cool mornings. We also recommend a light or medium weight pair of gloves if brisk mornings are expected.
Footwear
Should you bring trail runners or hiking boots? We suggest bringing the shoes that work best for you. About 70% of our participants have switched over completely to trail runners. Personally, we use trail running shoes. They are light and dry quickly. No matter the shoes you select, we recommend you purchase a half size to full size up from your normal shoe size since your feet tend to swell while hiking. Try on your shoes with the socks that you plan on wearing during the hike to ensure a good fit. We generally advise against Gortex/waterproof shoes. On our Sierra treks we often have multiple streams crossings where we hike through in our hiking shoes and boots. Trail runners or hiking boots with lots of mesh are best for this as they allow water to flow in and out and gradually dry as you hike. Thicker hiking boots take longer to dry and drain. Gortex/waterproof shoes retain water the longest. Using Goretex shoes while crossing streams defeats their purpose.
Socks
We suggest bringing a mid-to-light weight wool or synthetic blend sock. Generally, we advise against 100% cotton socks. Cotton doesn’t wick moisture, doesn’t insulate when wet, and can tend to bunch up creating hot spots overtime. We sometimes use simple hiking socks from Costco, though they degrade quickly. Here is a more robust brand that will last longer.
Camp Shoes
Camp and water shoes are not necessary but can be a welcome luxury when you are at camp and want to get out of your hiking shoes. We recommend something with a closed toe to prevent stubbed toes, but this is a personal preference. If you plan on using your camp shoes for water crossings, be sure it has a heel strap.
Kitchen, Hydration & Accessories
Your personal items include things like your spoon and bowl, your headlamp, your cup etc. In addition to these items which we will describe below, our checklist have a list of optional items which are not described here. Please keep these items to a minimum and be realistic. For example, many people have visions of themselves reading that book they have been meaning to get to while on one of our trips. In reality, if you aren’t a big reader, chances are you will be too tired to pick up that book and it will be dead weight in your pack. However, if reading is your thing every night, bring it!
Personal Kitchen
You only need three items to make your kitchen… a bowl, a cup and a spoon. Most people already have these items in their home. Kids bowls and plastic food storage containers can work well as bowls. Lightweight mugs or plastic kids cups are common on the trail. A backpacking spork, or a simple lightweight metal spoon will work as a utensil. Please make sure whatever items you bring can hold water that was recently boiled (coffee, tea, soup etc.) and won’t melt. You don’t need a knife, a plate, a fork or a lid for your mug. Those items add unnecessary weight. If you prefer to get backpacking specific kitchenware items, here is what some of us use.
Bowl – Sea to Summit Collapsible Bowl
Utensil – Sea to Summit Alpha Light Spork
Cup – Sea to Summit Collapsible Mug
Headlamp or Flashlight
Your personal illumination device is used for getting around camp when it’s dark, and for hiking on the trail before sunup, or after sundown which may be required on occasion. Headlamps are strongly preferred over flashlights, especially if you use trekking poles while hiking. We suggest something with the power of at least 150 lumens. Another nice feature to consider is a headlamp that has a red light option to soften the glow around camp.
Headlamp – Black Diamond Spot 350
Hydration
In the Sierra you will need 1 – 2 liters of water carrying capacity. In the Grand Canyon you will need 3-4 liters of carrying capacity. Some people bring water bottles, others bring hydration bladders with a hose/suck attachment. Both work great. Hydration bladders can slip nicely within your pack and provide ready access to water while hiking. Water bottles are great as well as they can be quickly refilled and easily ported to your camp, or grabbed for quick day hike. Some people use a mixture of both: a water bladder with 2-3 liters capacity and a 1-liter water bottle. Nalgene type water bottles are great, but do not feel the need to purchase one. Smart Water bottles are the perfect shape, they are durable, and they are light. Electrolytes are not on our list, but may be used to add flavor and recharge daily.
Water Bottles – Smart Water 6 Pack
Other Wearables
Here are quick links to other items you’ll need on your checklist. Sunglasses are a must for eye protection from rock, snow and water. Bandana’s are used as a towel, napkin, face wipe, sweat band, and more.
Insect Repellent & Sunscreen
Sunscreen is a must on every trip. Bring 3 – 6 ounces of something rated 30sfp or better. There are many bug repellent items on the market. We find a combination of permethrin and 100% deet work best for high Sierra mosquitos. Permethrin is a spray on used to pre-treat your clothing before you begin your hike. This is HIGLY RECOMMENDED before all of our Sierra hikes. Deet is an effective chemical that we use sparingly when they bugs are coming on thick. One to three ounces is all you need to bring. A bug head net may provide a degree of separation and comfort between you and the bugs while hiking or at camp. Bug repellent items are typically not needed on our Grand Canyon treks.
Permethrin – Treatment for Clothing
Have more questions? Learn with us live by attending one our online backpacking classes and events.